2010-08-22

LaTable : An easy way to write tables in LaTeX

By enormous search on the Net, I've found this wonderful tool to create Tables in LaTeX in a very easy way. LaTable  is free tool for creating LaTeX tables in What You See Is What You Get fashion. I've found it after I finished my work in LaTeX!!! Now I wish that I came to know this software a bit earlier.

Features
LaTable is a Win32 application having following features  :
  • Near-WYSIWYG editing style;
  • Real-time LATEX code preview;
  • Simple navigation through the table;
  • Limited clipboard support for import/export into other spreadsheet and text editors;
  • CSV file format support;
  • Generates 'tabular', 'array' and custom environments;
  • Support for custom column formats.
Homepage: http://www.ctan.org/tex-archive/help/Catalogue/entries/latable.html

Tutorial:
Copy portion of table prepared in Excel or any spreadsheet program like OpenOffice, gnumeric.
Creating LaTeX tables in easy way

Go to LaTable Window ---  press {c} * view code button to see the LaTeX code preview
LaTable : For LaTeX Tables in WYSIWYG  fashion
Select 1st cell -- and go to edit menu -- paste the contents of table. Do not use Ctrl+V key to paste.

LaTable puts automatically the copied data into a table and you can see the LaTeX code in code window.
Tables in LaTable

Make necessary table formatting from the table toolbar like - bordering cell/table, text arrangement, merging horizontal cells etc.
Customizing LaTeX Tables

To import the code, select the codes in Code window and copy it by pressing Ctrl+C keys.
OR
Go to edit menu - select copy as LaTeX code.
Copy LaTeX code for Tables from LaTable

Open your tex document in your LaTeX editor program and paste (Ctrl+V) the code at your desired position.

Writing a table in LaTeX is hard job and time consuming. So by using LaTable tool, you can easily make tables and customize them without being pro to the LaTeX  syntax.....

Enjoy it and if you find this article helpful, please comment here.

2010-08-16

CamStudio : Make your own video tutorial

If you are good at some software and want to share your knowledge about the software by making a video tutorial and upload it into video sites like youtube, then CamStudio is great free/open source software to capture screen into a video and convert it into flv file.


Free Streaming Video Software

CamStudio is a free video screen capture (screencast) program having simple-to-use interface. The user can select a specific area of the screen or the whole screen. They can choose to record audio from the computer’s speakers or from a microphone, making this a great program for tutorial makers.

CamStudio Features:
    * Record screen activity and sound into standard AVI video files.
    * Convert AVI files into SWF files.
    * Annotate screen movies with text captions and callouts.
    * Allow to control compression, quality, time lapse, and frame rates.
    * Autopan allows fixed region to follow the mouse.

Snapshots


Homepage
: http://www.camstudio.org/

2010-07-30

Must have Addons for common Firefox Users

AdBlock Plus 2 :
AdBlock Plus extension enables you to block adverts, banners, frames that you don't want to see surfing net according to subscription filter. You can also specify your own filter to block any web elements like pictures, frames, videos etc. The addon will make your surfing experience a clean and speedy one.
Homepage : http://www.adblockplus.org/
Block script : NoscriptNoScript addon prevents sites execute code without your explicit permission. It blocks blocks all third-party scripts including JavaScript, Java and Flash
objects until you give your permission for them to run. You can temporarily allow a site to run scripts or make it untrusted/trusted.
The combination of NoScript with AdBlockPlus works really fine for me for clean surf with better speed.
Noscript

Homepage : http://www.noscript.net
BatchDownload :
BatchDownload is the best addon for batch downloading images from website with a single click. See my previous blog on BatchDownload.
DownThemAll :
DownThemAll is download manager addon with resuming support. I find it more useful in downloading the extension of Firefox ( I prefer to download the addons than to install them in Firefox so that on installing OS, I can install all my favourite addons to Firefox.
Homepage : www.downthemall.net
Unplug Video Downloader :
UnPlug is awesome Firefox addon enabling you do download any embedded video content from most of video websites like youtube. It downloads audio and video from video sharing websites using this Firefox 3 plugin.

http://unplug.dbatley.com/screenshots/20090301_big.png
Homepage : http://unplug.dbatley.com/
Quick Translator :Quick translate the entire webpage or selected test in web by using services like Yahoo and Google after detecting the language and the translation will be displayed as a small tooltip or in a separated panel below the document. It has more feature than other translator addons.
Homepage : http://igorgladkov.com/extensions/translator.html

All in One Sidebar :

All in Once Sidebar addon puts bookmarks, history, downloads, extensions/themes, source code/brower information, webpage informations and lots of other dialog windows in a customizable side bar, which can be collapsed and expanded.
Homepage : http://firefox.exxile.net/aios/index.php
LightShot :LightShot addon can capture even selected part browser and even edit the selection area and save it as picture file or upload quickly with several shortcuts.
Homepage : http://lightshot.skillbrains.com/

ScribeFire : Firefox addon for those who love blogging

Good news for the blogger who love blogging. This is a beautiful firefox addon ScribeFire through which it's very simple to blog. Blogging becomes simple, easy and fast from ur firefox webbrowser.

Just copy any part of text with images in any webpages, open ScribeFire addon by pressing F8, paste it and publish to your blogger....

Homepage : http://www.scribefire.com/

For sample:
This is just part of previous blog on FreeDownloadManager, which I just deleted as the feature mentioned below didnot work when I tried. I just copied it from my blog and paste in ScribeFire..

==================================================
2) Download Flash Video from video sites like youtube, googlevideo, dailymotion, Livedigital etc.

a In the YouTube site, right-click on the thumbnail of a video you would like to download.
b In the context menu, select a downloading option that suits your needs best.

====================================================

Isn't it simple to blog?...............Enjoy

2010-07-24

Rip DVD-Video to 1 or 2 CD Sized Avi by AutoGk and Xvid

Xvid is MPEG-4 open codec which can codes video in avi format with large reduction in size providing best picture quality.

_____________________________________________________________________________
Warning : The illegal copy and ripping of copy protected material is prohibited/against the law.


Required Softwares: (Open/Free softwares)

AutoGK
DVD Decrypter

A little Info about the Softwares listed above:

AutoGK:
AutoGK (Auto Gordian Knot) is powerful and very easy to use tool for making DVD rips. It was designed for people who know very little about video conversion. AutoGK is able to calculate the maxium bitrate that can be used for video to still fit in on the selected CD/DVD size.

Contains following codecs and tools:
VirtualDubMod  Main video (Avi) editing program
AviSynth
BeSweet  Audio conversion
DVD2AVIdg
XviD - MPEG4 codec
VobSub  Ripping and displaying subtitle

DVD Decrypter:
DVD Decrypter to rip DVD-Video content to hard disk with removal of Macrovision Lock key, Region lock and decrypting the DVD. I have Samsung dvd writer and it generally takes about 5 to 6 mins to rip entire DVD-Video by this small and beautiful application.

AutoGK Guide

Step 1: Configuring Xvid Codec

For details about configuring Xvid codec, follow the link http://www.doom9.org/index.html?/xvid.htm


Step 2: Ripping the DVD


Enter the DVD you want to back up, then start DVD Decrypter select movie files select destination --- click on DVD to Harddisk button.

Step 3: AutoGK


AutoGK - DVD to AVI using Xvid

Open AutoGk.
1. Choose input file (For DVD video chose the desired IFO file where the mainmovie lies. Choose name for output file.

2. Select audio tracks and subtitle.

3. Selected your desired size for final avi movie. Specify size means encoding takes place in two-pass step.

Click on Advanced Settings.


Select desired output resolution settings (Auto width recommended)
Select Xvid as Codec. I prefer as Xvid is far better than DivX. And also Xvid is free/open source codec.
Choose desired Output audio type.

In the subtitle options: Display only forced subtitles means different-language dialogue is encoded on video. Use external subtitles
will create separate subtitle file. (Not selecting this option means subtitle will be encode with video.)

Press OK to get back to the main AutoGK screen and press Add Job to enlist the job in queue.


Now the Start button has become active and you can start the process pressing Start.
Press Start and AutoGK will start encoding.
For advanced setup, press Control + F9 to launch AutoGK assistant and configure the current job.
Details about advanced AutoGK options are mentioned in page http://www.autogk.me.uk/modules.php?name=TutorialEN

Check Shutdown when done to shutdown computer when encoding is done.

Enjoy small sized but nearly the same quality xvid movies as the original DVD video.

Warning : The illegal copy and ripping of copy protected material is prohibited/against the law.

2010-07-23

Batch Download Pictures from Website

Ever wanted to automate download of pictures from website? Here are two softwares for you --absolutely open software.
BatchDownload : A firefox addon---simply the best. Download images from any websites easily.

Homepage :
http://panshisoft.cn/batchdownload.htm

One great feature about it is if desired pictures have same filename but different no. s like 001, 002 etc or letters like imagea.jpg, imageb.jpg etc, then the addon automatically enlist the required names and download it just simply with a click. It's easy and simple only about 30kbs size.

Another option is BilderHerunterlader - an free software designed to batch download images from specially images sites with special filter and plugins. It needs Java Runtime to be executed.


Trouble Writing Equations in Latex :

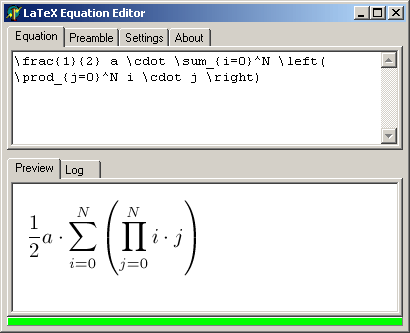
Are you new to Latex and do not know the syntax for equation editing ? Are you frustrated writing long equations in LaTex and annoyed by the error in long equations in compiling tex file ? Then here the best solution.
LatexEqEdit - a small open soft tool allow you to write the equations in LaTex in a Graphical User Interface. Just make equations by clicking on symbols button. If you want to write the equations in tex file, copy the code in equation box area and paste in LaTex Editor. Or if you want the equation in image, go to file - save image....
It's great open soft for equation edition and publishing. I had found it after several searches on the Net.
Snapshots

Configuration :
Once you've installed MiKTeX to some directory, you'll need to configure LaTeX Equation Editor. Run it and go to the Settings tab.
You will need to provide the path to texify.exe and to dvipng.exe. You can find both of these in the following directory: \miktex\bin
Homepage : http://latexeqedit.sourceforge.net/index.php
Alternative : If you have Mathtype - non open equation editor for Office, just type the equation as desired. Then go to preference menu - translator option. Choose translate to other language - tex ( Latex 2.x or higher). Copy the entire equation and paste it in LaTeX editor. It will paste the source code in \[.....\] environment with unwanted textblock above.
As I am fond of open soft, I recommend LatexEqEdit.
For hidden trick in Latex : here's the link http://dcwww.camd.dtu.dk/~schiotz/comp/LatexTips/LatexTips.html
Enjoy...

LatexEditor and Miktex 2.x : An Open Package for Scientific Writing

During my M.Sc. thesis, I'd to write the thesis in tex file - an open format particularly used for scientific writing.

For tex distribution, I perferred Miktex
Homepage : http://miktex.org/

For latex editors, there are many editors in the market. After testing various editors, my fav. one is Led - LaTexEditor a free soft. Homepage : http://www.latexeditor.org/

To configure Led according to your tex distribution --http://www.latexeditor.org/how_to_start.html - a great open software for tex editing.

Once configured, it's easy to write in Led. You don't have be perfect in LaTex commands, when you type in Led, it will automatically popout the syntax for the Latex command with options and examples. That's one feature I like about it .


Screenshots : http://www.latexeditor.org/screenshots.html

Another feature is that it has inbuilt DVI-Viewer. To enable the build-in DVI viewer when working with MiKTeX 2.x please follow these steps:

1. Download the dvi_miktex2x.dll file from www.latexeditor.org site
2. Copy this file to the MiKTeX 2.x executables directory (e.g., c:\miktex2x\miktex\bin).
3. Run LEd (if not working) and:
a. open Configuration/Options dialog,
b. open Application/DVI viewer section,
c. set TeX distribution to based on MiKTeX,
d. set font searching library to dvi_miktex2x.dll,
e. set font making script to makepk.exe,
f. set TeX executables to the directory containing MiKTeX 2.x executables (e.g., c:\miktex2x\miktex\bin).
4. Restart LEd.

I'd the following tricks in Led while preparing my Thesis.

Hint : For each images on the tex file, have two files with same filename but extension .jpg and .eps. For quick editing, you will need eps file and for pdf publishing, you will need jpg files.
For editing purpose, if you have .jpg files just rename to .eps and then use the inbuilt DVI viewer by pressing F9. The preview will be shown on DVI Viewer. On clickiing any part on the DVI viewer, the curser will go to that part on editor. Just edit there.

After finished editing and if you want your final output in pdf , then again rename .eps to .jpg and press F7 to get PDF file.

Open Software to Mirror (Copy) Website at Preferred Depth to Your Harddisk

Do you want to mirror or copy any website with the original layout of links upto desired depth to your own computer so that you can view it offline? Do you search on google and download the website copier or mirroring software but get harm by its spam or hacking of your computer or may be your computer crash due to it ( I faced the problem once) ?
Then, here's the solution:

WinHTTrack


An open software of website mirroring....... very simple with no cost at all........its an open software...............

Homepage : http://www.httrack.com/
Download : http://www.httrack.com/page/2/en/index.html
Screenshot : http://www.httrack.com/html/shelldoc.html

Enjoy mirroring your desired website from this open software......

Adblock Plus addon for Firefox : Save time and traffic

Get annoyed by unnecessary advertisements and banners while surfing the net. If you are using Mozilla Firefox, then here's a great addon called Adblock Plus. With Adblock Plus addon, you can not only hide unwanted contents but also surf the net faster. One of my best addon for Firefox..

Home page : http://adblockplus.org/en/
Screenshot : http://adblockplus.org/en/screenshots

First install the addon on Firefox, add filter subscription from the list and block the unwanted ads banners, pics, flash content by right clicking over them and choosing block item options.

For details instruction about installaiton : go to http://adblockplus.org/en/getting_started

Enjoy